An Inliner’s Guide to Getting Into Ice Part 1: Gear
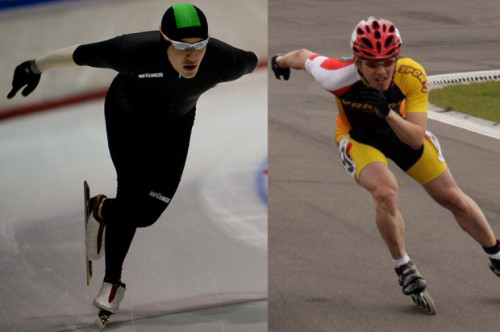
So you’re a pretty good inline skater. You’ve won a few national titles, perhaps you’ve even won a few national titles in different countries. Maybe you’ve been to world championships a few times. But now you want to try something new, you want to try ice skating.
There are many reasons why an inline speed skater would want to have a go at ice skating. Some people don’t like hot weather, others don’t like losing a leg-side of skin every time they crash, still others have Olympic aspirations. Whatever your reason, in this article I hope to provide some useful tips into making the transition into what may at first seem like a very alien new environment.
First you will have to get some gear. The most obvious difference between inline skating and ice skating is the ice. Anyone who has ever tried to inline skate on ice will quickly realize that urethane wheels are not ideally suited to skating on frozen water. You will need ice blades. But wait, there’s more… the demands of the sport, especially at the higher levels, require surprisingly different types of gear to most effectively skate around in circles.
It is my personal recommendation that a skater transitioning from inline to ice should first do short track. Short track skating takes place on a track of ice 111m in length while long track happens on a 400m ice track. The smaller confines, and sharper corners should be more familiar to inline skaters (particularly ones with experience in indoor skating), and the nature of short track blades, being fixed as well as having a rounder radius makes it much easier to acquire a “feel” for how ice blades behave. Even if you plan to ultimately transfer to long track, short track gives you a solid base in cornering technique, body position, as well as ice feel. It also helps you get used to the cold.
“there are really only two variables to consider, and those are length and stiffness”
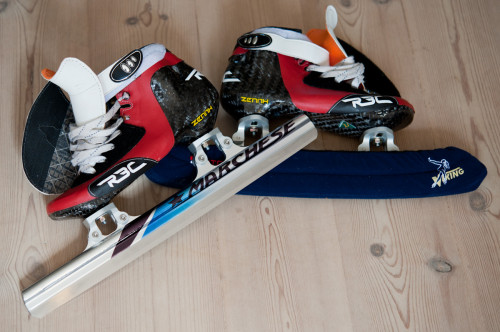
Short track blades are, in comparison to long track blades and inline frames, relatively inexpensive. It is easy to see why – they are structurally quite simple beasts. In the early stages of getting into short track, there are really only two variables to consider, and those are length and stiffness. Length can be chosen based on the size of your feet with 15 inches being a good length for juniors while 17-18 inches is as long as you’ll ever want to get as a senior. Luckily, it is not crucial to get this exactly right as a beginner, because most of your time is spent on 2-3 inches of blade, right in the middle of your skate anyway. Stiffness is determined by your bodyweight, but for beginners it is advisable to err on the side of being too soft, rather than too stiff. As you become more experienced, and your technique improves, how your rocker, your bend, and even tube thickness become more important.
The boots are essentially the same as inline boots. In fact, until relatively recently, short track boots have been IDENTICAL to inline boots, and manufactures didn’t make much of a distinction. Recently though, the bolt spacing on inline boots has changed from 165mm spacing to 195mm spacing. Fortunately, owing to the very simple nature of short track blades, one can easily get around this problem through use of an adaptor. Obviously, if you ever want to be a competitive racer in short track, you will need purpose-built short track boots, but as a beginner, adaptor plates will do just fine. Weber sports sells a good adaptor, and Raps (owners of the double-void extrusion patent) also manufacture an adaptor.
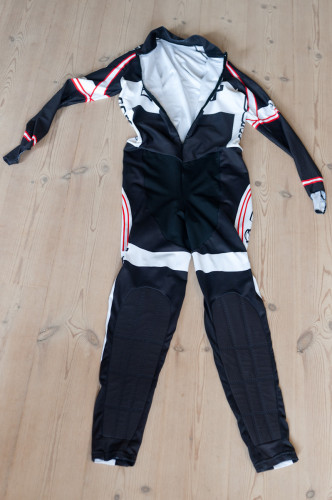
An obvious difference between ice and most other skating surfaces is that it is cold. Ice halls and stadiums are, as a general rule, quite cold places and one thus has to dress accordingly. Short track suits have long sleeves, that is the most obvious difference. If you look closely at the photo above, you will also notice that they have shin pads. These are relatively soft shin pads, and it is common for skaters to wear harder shin pads underneath. The reason for this is obvious – in an inline pack, you occasionally get bumped by someone else’s skates, but it’s ok because wheels are not particularly sharp. Ice blades on the other hand, are quite sharp and the pads act as protection.
At higher levels of competition, cut proof suits will be required. These often take the form of full suits worn underneath a club or national suit, or sometimes the cut proof material is built into the suit itself. These suits are very expensive however, and protect the skater from very high-speed impacts, and the beginner skater need not concern themselves with them.
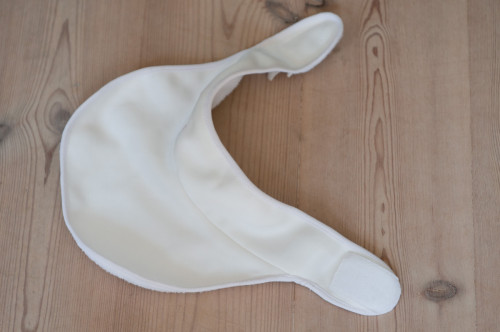
On the subject of protection, there are a plethora of other bits of protective gear used by short trackers to protect themselves from stray skates. The funny looking thing pictured above that looks a bit like a bib is a neck guard. This protects the veins and arteries around your neck from potentially fatal injuries resulting from crashing and ice skates. These are made out of a material that provides a high degree of cut-protection (usually a fibre like dyneema or kevlar). In addition to neck guards, one can also use ankle protectors to protect the very obvious veins and tendons that are concentrated around the ankle area.
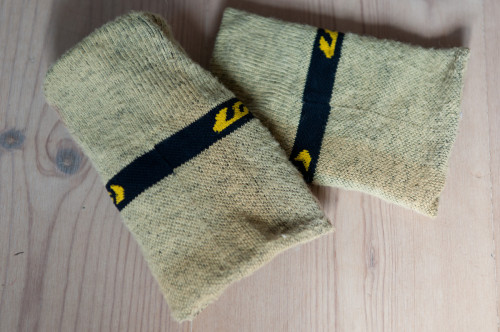
ankle protectors protect your ankles. they can also protect your wrists (if you wear them on your wrists)
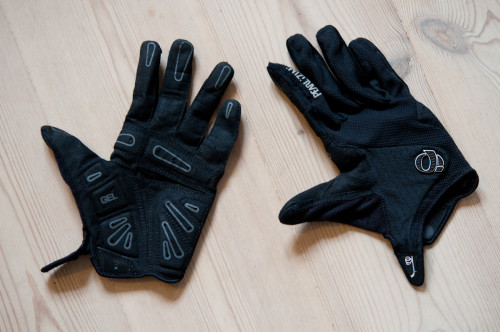
one final bit of obvious protection that every beginner should have is a pair of gloves. These are useful not just for protection from the cold, and other people’s skates, but eventually for “pivoting” (where you put your hand on the ice in the corners to steady yourself when you’re leaning very low). Most inline skaters should be familiar with the idea of wearing gloves, but it is important to note that gloves for ice skating should have full-fingers.
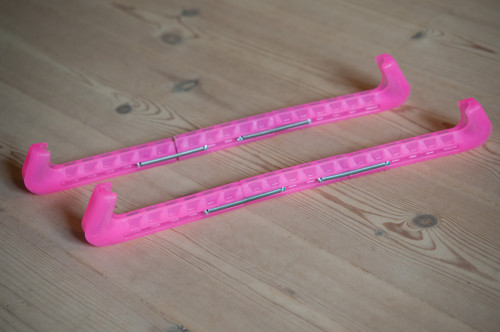
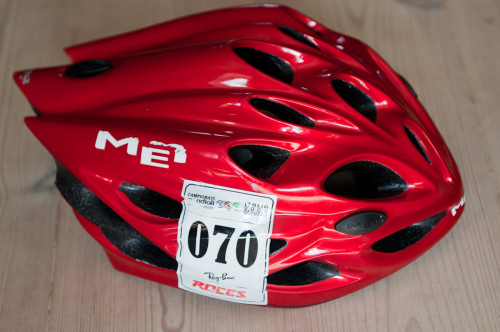
Other essential things to bring to training include a towel for drying the ice off your blades. It may sound slightly strange, but ice skate blades can and do rust. Also, no skating training session on the short track would be complete without a helmet. Special purpose-built short track helmets do exist, but for beginners, any kind of bicycle helmet should suffice.
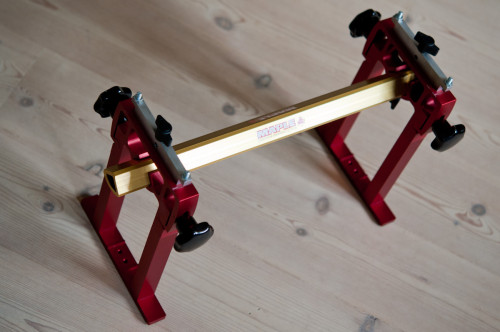
So this is pretty much all the gear you will need to get on the ice and have a skate around. Initially, things like sharpening your skates (which I might cover in a later post) can be done on borrowed club jigs, or skate shops (if you happen to be in Canada or the Netherlands), or even very generous friends. Eventually though, you will have to accumulate the gear required to keep your skates sharp. Eventually, you will also need to learn about how to set up your blades properly. For now, I will just go through the gear.
with regards to jigs, I would recommend one that easily disassembles because they are easier to travel with. There are many different types of jig out there and they all work fine. In a later post I will cover some basics about how to set up a jig properly (what little I know about it). It is important to note that due to very slight differences between jigs, you should try to always sharpen your skates in the same jig. I am often asked if it really makes a difference and the answer is “yes and no”. Yes, it does make a difference, but no, there is a good chance you won’t notice it. But for a top skater, skating at almost 60km/h, balanced on a piece of steel 1mm thick, these very tiny perturbations can definitely be felt.
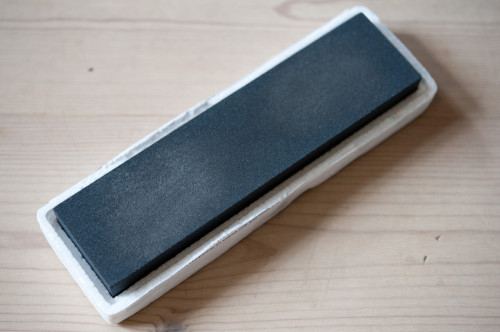
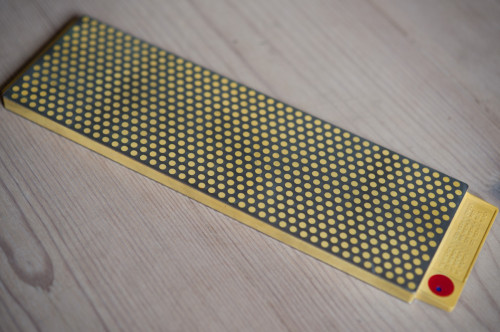
The other essential part of the sharpening is the ubiquitous sharpening stone. Stones purpose-built for sharpening skates are sold in many specialty skating shops, but any stone that is flat can be used. Most hardware stores carry stones which are designed to be used with tools like chisels. Many specialty kitchen cutlery stores also carry stones, but these have a much finer surface and are more suitable to be used as polishing stones rather than sharpening. In general, the width of the stone should be at least seven inches.
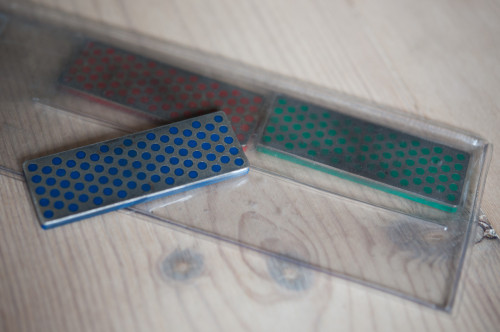
In addition to the large sharpening stone, smaller side stones are also needed. These can be much less coarse than the large stone as they are used to refine the edge of the blade from the sides, and not the top. These stones are also useful to have in your skate bag “for emergencies”.
Once you start getting into serious competition, (and presumably some serious speed), the setup of your skates will matter more and more to your progress. Variables such as the rocker and bend of your blades will become important, as will the ability to adjust those variables. For now, I will simply list the equipment required and will leave the explanation of how to use them properly to a later post.
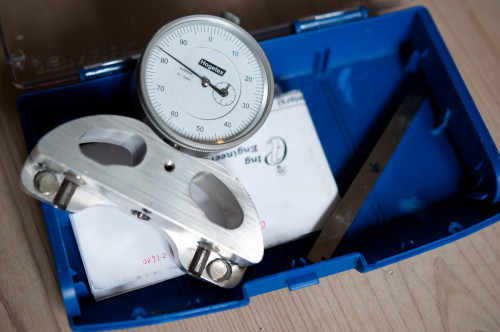
The first tool in the arsenal of a skate tech is the 3-point gauge. The principle is simple enough – it measures how far a central point deviates from a theoretical straight line between two other points. It is the tool that allows you to measure both your bend and your rocker (they are both basically curved lines, curved along different axes).
The “rocker” is the measure of the radius of the curve of the blade along the plane of the blade. Because of the way a blade deforms when you put pressure on it (that is how ice blades turn) the rocker will affect the radius at which you turn corners most effectively. On a long track, where the corner typically has a radius of 23-26 meters (depending on whether you are on the inner or outer lane) the radius of the blade is often very slight, usually between 21-26 meters. A smaller radius (more curve) allows you to feel the blade steering better, while a larger radius allows more blade to be on the ice at any one time, giving you more glide and more pressure.
On a short track, a long track blade cannot ordinarily turn the corner under pressure (you can get away with it if you are going very slowly, or are very light). The radius must be much, much smaller. On my blades, the radius is 6 meters near the toe, 11 meters in the middle, and 5 meters at the heel. This is called a “variable rocker” and is the norm in modern short track skating. Adjusting the rocker is a matter of putting the blades in the sharpening jig, running the gauge over them, and slowly “sharpening away” sections of blade until the radius matches what you’re after. It can take a VERY long time to do this, so we use diamond stones (pictured above) because they have the property of being very abrasive, while still being very smooth and flat. Machines are also commonly used to do the initial work, with the final adjustments being done by hand.
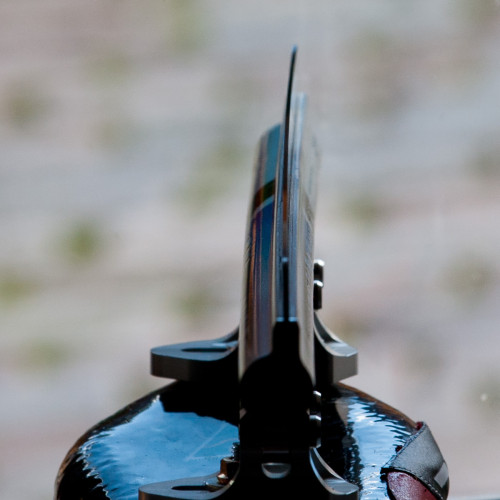
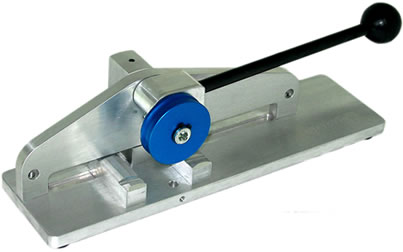
The bend, like the rocker is also the measure of a curvy line. This time it is the radius of the curve of the blade along the plane of the ice (it is easier to see what I mean by looking at the photograph above). The bend is considerably more difficult to implement and adjust because it involves, you guessed it, actually bending the blade. The purpose of bending the blade, is so that a longer section of blade is touching the ice while one is cornering (to get the same amount of contact patch without a bend, one would need to put much more pressure on the blade, and sometimes this is simplt not possible). The tradeoff with a bend in any one direction is that you sacrifice a lot of push in the other direction. In short track, where you spend most of your time turning left, this sacrifice is negligible. In any case, the gauge is used in a similar way as is done for rockering, but a different tool is used:
As you may have guessed by the absence of the wooden background in this image, I do not own one of these. For long track skates, the blades are also bent, but the bend is very slight, especially on the left skate (because both edges are important for pushing in long track, whereas in short track, both skates are used mostly for cornering in one direction).
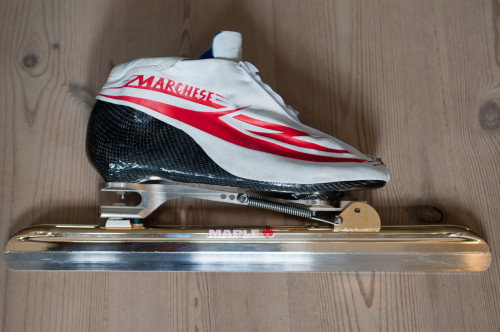
long track skates, quite different from inline skates (important note: these are not "typical" skates that you would buy in a shop)
Once you’ve had a good taste of short track skating, you may want to simply continue with it, or you may want to give long track skating a try. Thankfully, much less protective equipment is required (because collisions between skaters are much less frequent). The boots and blades however are very different. While it is obvious in the above picture that a long track boot is much lower-cut than a short track or inline boot, what is less obvious is that they are much softer structurally. This is because the ankle is a much more active part of the skating technique, and a softer boot allows you to “feel” the ice more, which is essential in long track.
The blades are also very obviously different, with a hinge at the toe giving them the name “clap skate”. The clap basically allows your push to extend further than it normally would – they are not used on short track because it is unsafe to have clap skates when skaters are in such close proximity. It also makes the blades very much more expensive than short track blades. Unfortunately, while it is relatively easy to find inexpensive short track blades from many different manufacturers (Maple, Pennington, Bont, just to name a few), there are basically only two manufacturers of decent long track blades – Viking, and Maple. A third has recently made an entry into the scene, but at the time of writing, I only have authoritative accounts on their top-end product, which I would not recommend for a beginner long track skater.
So to get started, any low-cut boot with 165mm bolt spacing which is reasonably structurally soft will do. As for choice of blades, I would personally recommend the maples for an inline skater making the transition to ice as they are stiffer than the vikings and will “feel” and behave more similarly to inline skates. If you’ve been doing a lot of short track as part of your transition, then you will find soft long track boots an ankle-strengthening experience, but should get the hang of cornering quite quickly. Deeper technical advice I will leave for a later post, but suffice to say that the main difference between ice and inline straights is the timing.
It is important to note that it is extremely beneficial to do all three of these at the same time. Inline skating is excellent for maintaining physical conditioning during the warmer part of the year (and you also get to be outside). Short track skating is the best thing you can do for your corners as it is unforgiving of poor technique and on the ice you effectively have an infinite amount of grip, while long track allows you to reach speeds much higher than is possible on either inline or short track. All three can have benefits for the others and it should surprise nobody that some of the best long track skaters in the world came from a background of either inline or short track.
I shall write more later, and hope to cover the subjects of technique and biomechanics in later posts, but for now I hope that this article has given you a good idea of how to get started. Feel free to leave a comment or contact the author via the contact form on this website.

A good topic would be finances: that is…approximately how much money do I need to have saved up, up to to the point of olympic selections?
Could my question be too open ended (i.e. how long is a piece of string), and has too many variables? If so, perhaps you could make narrow assumptions like: a foreigner training in the Netherlands, not having 100% sponsorship, must train 9-5 so having a local outside employment is out of the question, living in bunk beds, etc.
I’m just putting it out there.
If you could reduce your answer to say…you need USD$100K per year (up to the point of olympic selections) – adjusted for CPI, it will give ‘would be ice skaters’ realistic expectations.
excellent question!
yes, quite difficult to calculate, but I could probably come up with a rough figure, and it would be quite high. The trouble with most countries’ elite sport programs is that you have to be very near the top before you get any funding. Maybe it would be a fun exercise to come up with some kind of minimization of the cost.
Despite having to replace wheels all the time, inline skating is still much cheaper than ice… and running is much cheaper than inline skating. Maybe I could design a cost-minimizing 10-year training plan to go from zero to olympic speed skater. Although… even if I designed the optimum program, it would still only take a very small percentage of people to the olympics…
THANK YOU!! Very good article. ^_^
Good article! BTW, do you know if it’s possible to put hockey blades on (ice) speed skates? Would short track be better than long track for this? Or would it just not be possible? Thanks!
To be totally honest, I don’t know. I’m not familiar with the mounting standards for hockey skates. IF it is possible, it might be better on short track boots than long track boots simply because they’re higher and stiffer, which means that the feeling would be closer to hockey skates (I’m guessing).
I was wondering if you might know if it’s possible to put hockey blades on speed skate boots?
It is, but only in a very specific case. The skate manufacturer Powerslide makes boots with what they call a “trinity” mount and they also manufacture a hockey blade which fits on to this mount. During the winter, I use a pair of trinity-mount powerslide custom-made speed skating boots, paired with a set of trinity-mount hockey blades for the purpose of recreationally skating with my very young child.