

How to Set Up a School Garden
2. Get support
Within the local community, you will find people who are knowledgeable about specific gardening aspects, such as the cultivation of fruit trees and medicinal plants. It is worth investing some time to encourage these potential supporters to contribute their knowledge, skills and, possibly, some basic materials.
3. Decide what to grow
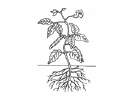
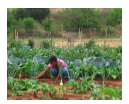
What will be grown in the school garden depends on the objectives set, the space and water available and the soil quality.
Natural limitations such as poor soil or long periods without rain can be overcome
by compostingCompost, “brown gold”, is the magic ingredient of good gardening. It provides nutrients to make soil rich and fertile, and keeps it moist and airy by opening up the soil, and trapping and draining water.
Compost ingredients: Most organic materials can go into compost: straw, cut grass, organic waste from the kitchen, weeds, plants, leaves, animal manure, wood ash, animal and fish bones, feathers, cotton cloth, bits of leather or paper, soil. Do not use cooked food, large pieces of wood, plastic, metal, glass, crockery, wire, nylon, synthetic fabrics, coal ash, seeding grass or very tough weeds.
Compost containers: Compost can be made in a bin with a roof for shelter. Having three bins is best: one to make it in, one to move it to, and one to store it. It can also be made in a pit, in a large cardboard box or in a large strong plastic bag with air holes. The important thing is keep it “cooking” by keeping it damp and giving it air.
Making compost: Start with a layer of sticks for drainage, then follow with layers of grass, leaves, manure, soil. Mix wet and dry, and alternate brown and green. Chop up big leaves. Add a final layer of soil, make a hole in the middle to let air in, water the heap and cover with grass or with a cloth to keep it damp. After about five days the heap will heat up as bacteria work to break it down. Keep the compost damp. After about six weeks turn the compost - take it out and put it back, or move it to the next bin, always keeping it damp. Turn it again every few weeks. After three months test it. If it is dark, crumbly, light and moist, it is ready to use.
Using compost: Use compost as soon as it is ready. Spread it before planting and when potting, and put it around growing plants every two weeks. Don’t let it dry out: use it in the early evening, when it is cool, and cover with mulch to keep it damp. and wateringFor wet areas or wet seasons:
Dig holes and canals to drain water; add compost to drain clay soil; grow plants that love water (e.g. rice, taro, lotus, water chestnuts); protect young plants from heavy rain; grow plants on trellises and use containers; don't mulch too much
For dry areas or dry seasons:
Use “grey water” from washing; harvest rainwater with gutters and water tanks; grow crops near the water; prevent runoff - put beds across slopes and build up edges; use water conservatively - use a drip system, NOT a sprinkler; use a lot of compost and mulch; provide shade for young plants; remove competitive weeds that steal water; grow dry-climate crops (e.g. mung bean, egg-plant, sweet-potato, mango, groundnut, okra).
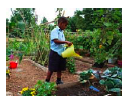
Methods of watering plants
• Flood the bed - in dry places make a sunken bed to keep the water in.
• Drip irrigation - use a drip hose or soaker hose.
• Water by hand with a watering can or a plastic bottle with holes.
• Make water traps - e.g. keep the water in by digging a shallow trough round the plant.
• Water plants individually with sunken tins or upended bottles
Watering advice
• Water seeds and seedlings gently.
• Don’t drown plants by over-watering. If they need a lot of water, give it in stages.
• Water the soil, not the plants. Get the water to the roots. Water on leaves can hurt plants.
• Don’t use a sprinkler - it wastes water.
• Measure moisture each day with a measuring stick. When the top 3 cm is dry it’s time to water.
• Water in the morning or evening when it is cool so the water doesn’t evaporate.
• Deep roots don’t need more water: let plants dry out between waterings to encourage roots to grow. Nevertheless, you should try to choose
plants that are adapted to local ecological conditions. Start with plants that
are known to grow well in your region to keep the risk of failure low (see
chapter "What do plants need to grow" for examples of crops grown in yourclimatic
zone).
For example if the idea is to sell the products, own should first determine for which products there is a demand.


